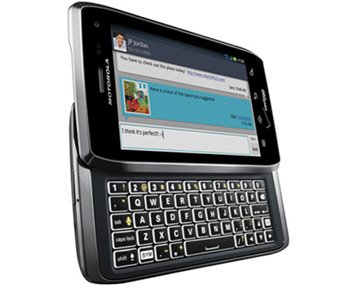
Install Jelly Bean 4.2.2 Avatar 3.0.1 Nightly custom ROM on Motorola Droid 4 XT894
There are a lot of things that Motorola Droid 4 XT894 does well and better than other devices of its kind. And yet, there is one thing that misses from the picture: an update to Android 4.2.2 Jelly Bean with Avatar 3.0.1 Nightly custom ROM. And this is our duty for today: to provide you with all the necessary utensils which are going to have your Motorola Droid 4 XT894 upgraded. The whole process only needs some steps. But before that, it needs you to prepare the smartphone for what’s to come with a set of requirements.
Requirements
What this upgrade has in store for all users of the Motorola Droid 4 contains advantages such as no bugs, better stability, better performance and so on. The update will also deliver the kind of features that are required for its well-being. However, every update solution comes with a small glitch; which can be solved if you update the smartphone to software released by the manufacturer or if you install stock Android firmware instead. That small glitch is as follows: the device is going to lose its factory warranty. So do as we said to get this very important of your handset back. Those pre-requisites we mentioned briefly above are below:
- root the Motorola Droid 4;
- get a custom recovery image on this smartphone (CWM Recovery and TWRP are two of the best ones, so opt for one of them and install it on the handset after you root it);
- use a laptop or personal comp which runs Windows (or flash CrossOver Utility for a laptop/PC whose OS is either Mac or Linux);
- make backups via these instructions (we recommend you to also make a full NANDroid backup);
- charge your phone’s battery;
- use only Motorola’s Droid 4 XT894;
- turn on USB Debugging on the latter;
- also make sure its antivirus programs (and other software that offers protection against all kinds of threats) are all turned off;
- go to your notebook and do the same as above.

How to flash Avatar ROM on Droid 4
Here is where we will introduce you to the steps we will use for today’s update guide.
- As first instruction, you need to do as we say below: – find the ; – download it on your laptop’s desktop; – save its content there, too; – leave it unzipped; – find Gapps package; – download it on the PC via this link; – save it on the same desktop; – leave its content unzipped, too.
- After you are done with the tasks above, you should realize a connection between your two devices with the phone’s USB cable and then go to the desktop.
- After that go to the files you downloaded on it and take them from there to the smartphone’s SD card root. Now make sure your smartphone and your PC are not in close connection anymore; for that, take the USB cable away. Afterwards you should power the handset off and reboot it into Recovery Mode.
- Wait for the mode to appear. Then opt for Factory Reset/Wipe Data. Then look for Wipe Cache Partition, select that option as well; then choose Wipe Dalvik Cache and you are done with these steps.
- [sc name=”banner-jos”]Move onto the next one which tells you to go back to the Recovery menu and, once there, choose this option: Install zip from SD card. Opt, next, for Choose zip from SD card and then choose the update firmware so that it is installed on the Droid 4.
- What you just did for the installation of the Jelly Bean 4.2.2 Avatar 3.0.1 Nightly should also be done for the flashing of Google Apps.
- When your handset has both packages installed on it, you have to choose Go back from Recovery. Then opt for the system restarting option. Your XT894 is now fully updated!


