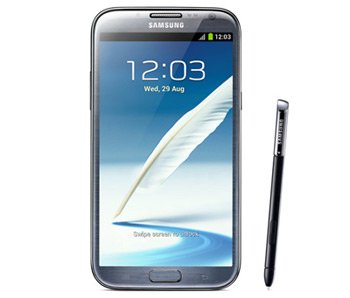
Root and install CWM Recovery on Galaxy Note 2 N7100 (Jelly Bean 4.3 XXUEMI6)
Once you have completed our tutorial on the best way to upgrade your Galaxy Note 2 N7100 to XXUEMI6, you will next get to know how to root and get CWM Recovery on the same device.
Requirements
You might want to look at these requirements before you root the smartphone:
- make a backup of the phone’s crucial data;
- turn on USB Debugging on the handset by tapping Menu, then pressing Settings, choosing Applications, opting for Development and then selecting the box with USB Debugging written on it;
- flash USB drivers for the handset on your notebook;
- use the device which is carrier and factory unlocked;
- charge the battery of your smartphone;
- only use the Galaxy Note 2 GT-N7100 for our tutorial.
While you enjoy your rooted Galaxy Note at the end of our post, you should know that there is no more warranty on it. But you need to know that you can retrieve it by finding a guide which shows you how to unroot the handset.
Instructions
Proceed with the guide by finding out what steps are needed for the rooting.
- The first one to pay attention to: download , Odin tool from here and (which has to be left unzipped) on your laptop, then unzip the second file on the latter device.
- After that, make sure to transfer the rooting package to the handset’s SD card root after you’ve connected the phone to your PC; the connection will be successful only if you see “Added!!” and an ID:COM box whose color must be either blue or yellow, so if you don’t chance upon them, either install the USB drivers again or use a USB port which is different this time).
- When done, you should power your N7100 off and then enter it in Download Mode (which must be done by simultaneously pressing + holding Volume Down + Home + Power and, as soon as a screen of warning is displayed, you need to go on by pressing Volume Up to complete this step.
- Now that your devices are still plugged to one another, you have to run the Odin tool .exe as an Admin by right-clicking on the Odin.exe, then clicking, from Context Menu, on “Run as administrator“.
- Then tap “PDA” while still in the Odin. Now opt for the recovery file which has that .tar.md5 extension and then check these boxes: F. Reset Time and Auto Reboot; if Repartition is activated, deselect it. Make sure to tap “START”, an action which should get the flashing of the rooting file into motion.
- Wait for the Galaxy Note 2 N7100 to reboot and display “PASS” on the screen. Now disconnect the smartphone from your notebook and then switch the device off.
- [sc name=”banner-jos”]After that: enter it in the Recovery Mode again and, from there, choose both “Install zip from SD card” as well as “Choose zip from SD card“.
- Next up: go to the SuperSU zip file, opt for it, confirm its flashing and then have patience till the process ends. When it’s all over, you can go back to the phone’s Recovery Menu.
- Then simply restart your handset by choosing this rebooting option. Once the device is restarted, it will be rooted and should feature the CWM Recovery.


