How to Root LG Thrive P506
LG Thrive P506 can offer many surprises if you make room for root access on it. This brings along a lot of stuff that’s innovative. Take a look below and experience the rooting for yourself!
Your LG Thrive is guaranteed the presence of many and very useful novelties. Since it was released 3 years ago, your phone’s 600 MHz ARM 11 CPU has been needing some improvement. And that is about to happen once you install SRSRoot. This is the rooting tool which will make all the difference. Apart from turning the processor into a faster one, the app can also bring about new features. Besides these, the device will have custom ROMs and the same Android 2.2.1 Froyo OS it’s been using since the release. This tool is able to work extremely well with all of the Android versions Google’s launched till now (and will in the future).
The benefits of this method
The SRSRoot is free and it’s powered by an SRS Server. Customization and battery tools come together with admin / superuser permission. A rooting will also include root-only apps. This freeware application isn’t going to introduce your LG Thrive P506 to unnecessary programs, files and so on. By using this app, your device can be sure that no security problems will appear along the way. Even if your product isn’t the one mentioned in here, you’ll still be able to use the SRSRoot just fine. Last but not least, consider a Build ID before you root the smartphone. FRG83 is the one we used. Another benefit of working with the SRSRoot is that it allows you to use the Build ID of your choice.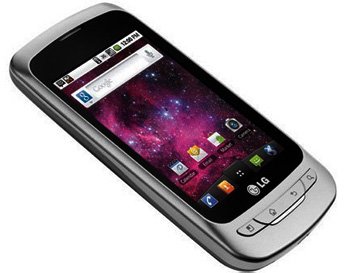
As is the case with all of the rooting procedures, exposing your device to one leaves it warranty-less. Having this important element back is a job for a dedicated guide. Pay attention, though: to have the warranty restored, don’t use a post that contains another gadget model.
After the handset receives update material, its system partition will be erased. Likewise, the smartphone’s root access will suffer a blow by being revoked. No bad stuff is able to affect the product’s important data or internal / external SD cards.
Prerequisites
This rooting is in need of requirements. These are important and you’ll find them below:
- you should have your laptop open this Internet address;
- this page has USB drivers that should be downloaded and then flashed on the laptop;
- tap USB Debugging on your smartphone;
- through the creation of one or more backups, the data on your phone will be saved;
- perform a full NANDroid backup;
- Windows has to be the laptop’s only operating system;
- your phone comes with a battery which must be fully charged for the rooting;
- the laptop’s security software must be deactivated;
- the security software provided with your handset has to be disabled, too.
Step by step instructions
- Not long after you’re done with the upcoming steps, your LG Thrive will be rooted. In order to safely get there, start by downloading the rooting freeware on the laptop.
- The link here is where the app can be found. Click on it, then on a download button. Your laptop is now ready to have the SRSRoot downloaded and installed on it.
- As soon as these actions are behind you, perform the one which tells you to open the app on the laptop. You should then find Settings after tapping Menu on the phone. After you enable these options, turn on Unknown Sources. Its whereabouts are under the Settings option.
- The task you have to do now tells you to tap the following (if you didn’t do it before now): USB Debugging. The laptop and your LG Thrive P506 need to have a connection generated between them.
- To create this, the handset’s USB cable will be necessary. A couple of minutes later, the plugging will have been established.
- This means that the rooting can now commence. Start this procedure by tapping, on the smartphone, an option. It’s called Root Device (All Methods). Waiting till the rooting’s done is very important.
- [sc name=”banner-jos”]Prepare for about 10-15 minutes of this waiting. If the process isn’t going that well, it’s essential that the previous steps are all repeated.
- If you aren’t experiencing issues at this point, then it’s better that your LG Thrive P506 restarts. Reboot it by enabling this: Reboot System Now. Once this is over, your smartphone will say hello to the root access at long last! Getting used to it is essential.
Allow yourself some time to do that. This is going to determine if the rooting was really needed. In case it wasn’t, you can depend on the unrooting freeware; the latter has the power to unroot the device.
Below is a comment box. Don’t be afraid to use it if problems pop up during the rooting.


