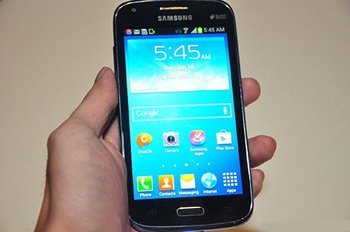
How to root Samsung Galaxy Core I8260
Galaxy Core I8260 from Samsung is in for a treat. More specifically, you can root it with a one-click method and enjoy all the stuff that arrives with this. Have fun with your smartphone after it’s rooted!
Before we get to the steps that actually root your device, you should know what tool you’ll get for your handset. It’s known as SRSRoot and it’s free to install. The Android versions it works with can be varied; it doesn’t matter if you are already using a certain Android version (4.1.2 in this case), the new tool won’t mess with it.
The Build ID we’ve used for today’s rooting is JZO54K.I8260XXAMF1. If you don’t want to use this Build ID, you can always select another one. The list with the compatible firmwares if this one (but you can use the tool for other versions too): XXAMI3, XXAML3, XXAMK1, XXAMG2, XXAMF2, XXAMH4 and XXAMG3 (Android 4.1.2 Jelly Bean).
Your device first came out last year. Running a dual-core 1.2 GHz Cortex-A5 CPU, the rooting you’ll perform on it will deliver superior performance. And your Galaxy Core GT-I8260 will, thanks to the SRSRoot software, land custom ROMs, new features and root-only apps.
The advantages of rooting your device
Besides all of these novelties, you’ll enjoy these, too: superuser and admin permissions. The smartphone will be easy to customize with various tweaks. Your device will not be affected by security threats and no bloatware will damage your enjoyment. Because you’ll have such a great tool on-board, the phone’s battery will improve, which means many more hours to use it!
After your smartphone gets rooted, you will be able to go on and root another gadget with the same tool. The developer behind the SRSRoot method allows you to use it not only on Samsung devices, but on other models made by different brands. Thanks to the fact that this software is powered by SRS Server, you can always unroot the phone with this one-click method.
If you want to root the Samsung GT-I8260 with the SRSRoot software, we should warn you of some unwanted consequences. One of them has to do with the phone’s warranty; once the rooting’s achieved, the latter will be revoked. We must urge you to use the smartphone model here for the procedure; if you’re rooting the wrong version, the device will be affected in the end. If, later on, you want to get new update firmware for your handset, you’ll need to give up some things. They’re your device’s system partition as well as root access. Both of them will be deleted from the phone.
Prerequisites
You are now asked to pay attention to some extremely important pre-requisites:
- before you begin the procedure, make sure the phone’s data has been saved via backups;
- make a full NANDroid backup as well, with the following instructions;
- the battery that comes with your smartphone should be charged to its fullest;
- install USB drivers for this Galaxy Core I8260 on your notebook by opening this particular page;
- your notebook’s special security programs have to be deactivated;
- turn off the security software that’s installed on the phone;
- USB Debugging must be activated on the handset, too;
- your laptop should have Windows already installed on it.
Step by step instructions
These requirements are all compulsory. If they’re not performed, your smartphone won’t get the rooting it deserves. After they’re all followed through, you need to find this site first.
- This step is needed so that the SRSRoot software can be downloaded from that page; you’ll see there a button that must be tapped. Once the tool is downloaded, install it on your laptop and then make sure it’s launched on the same device.
- Settings is the option which must be activated on your Galaxy Core I8260 for the next step. You should wait until Unknown Sources comes up.
- When it does, activate it and after that enable USB Debugging. If you have already turned this particular option, move on to the step that says this: create a connection between the notebook and the phone.
- [sc name=”banner-jos”]The USB cord which comes with the handset must be used for this particular step. If the connection is now established, tap this option: Click on Root Device (All Methods).
- The rooting procedure is going to begin after you perform the previous step. As such, have some patience and in about 10-15 minutes you’ll have a rooted smartphone.
If you don’t like the new software, you can use the SRSRoot method to unroot the phone. You can always leave your questions about this rooting in the comment field below this post.


