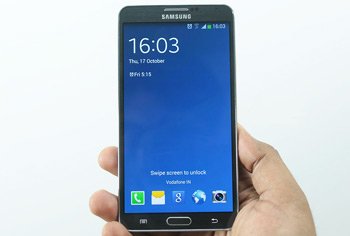
How to Update Galaxy Note 3 Neo SM-N7505 to Android 4.3 ZHUAND1
There’s a lot of great stuff waiting for you after Galaxy Note 3 Neo LTE SM-N7505 gets Android 4.3 Jelly Bean. But for that, your smartphone’s in need of certain firmware. To find out its name and how to install it, you have to follow this tutorial.
The smartphone to be used for today’s update must be the Galaxy Note 3 Neo LTE SM-N7505. That’s because ZHUAND1, released this month for Hong Kong, is compatible only with it. You will damage your phone if it’s not the one in this tutorial. Moreover, you have to choose between OTA and this guide if you want the new OS on your device. For OTA, a phone with stock ROM is needed.
If you’re using a device equipped with root access, using the new OS means having to sacrifice some things. First off, root access will be revoked. Your phone will then be left without its system partition. The upgrade is not going to ruin the internal / external SD cards or your device’s data.
If you’re hoping for many customization tweaks, new features and other novelties, the Android 4.3 will bring all of that. Also, it will make sure the performance of your phone is boosted.
Prerequisites
The requirements that go with this guide are all mentioned below:
- the Samsung SM-N7505 has important data on it, so make sure you preserve it with backups;
- move on by creating a full NANDroid backup for your phone;
- the battery of your smartphone must be fully charged;
- your laptop needs to sport Windows as an operating system;
- turn off the security programs which are already installed on your handset;
- then be sure to have the ones running on your laptop disabled;
- install, on the notebook, only those USB drivers which work with your handset;
- enable, on your phone, that option known as USB Debugging.
Step by step instructions
When the moment to install the new firmware comes, you should perform some steps.
- Here’s the first one of them: download Odin 3.09 from this location and the on the laptop. After securing these on the device, proceed to this step: extract each of the packages with WinRar, then look for a file that’s called Odin v3.09.exe. You should launch it, after finding it, on your laptop.
- Download Mode needs to be entered into by your smartphone. To be able to restart the latter in it, you have to do as follows: press and hold Home, Power and Volume Down simultaneously until you are greeted by a boot message. When it’s there for you to see, release the previous buttons. Now be sure to press only Volume Up.
- Next up: create, with a USB cord that comes with the phone, your Galaxy Note 3 Neo Lite N7505 to the notebook. You should now wait for Odin to give you a sign about the connection. When a sign in blue comes up, the connection will have happened.
- So continue with this part now: once the firmware file is added to AP / PDA, Auto Reboot has to be checked. When F. Reset Time is checked, as well, do this: find Re-partition and uncheck it.
- The flashing of the ZHUAND1 will begin after you tap “Start“. Shortly after the tapping happens, the firmware will go into installation mode. The flashing will be over once about 14 minutes have passed.
- As soon as your smartphone reveals a message saying “Pass” and you also see it reboot on its own, then the installation will have actually ended. If so, move on to this step: unplug the handset from your laptop.
- [sc name=”banner-jos”]This is done by simply removing the USB cable that used to connect your devices to each other. After the firmware is on your Galaxy Note 3 Neo SM-N7505, you have to open the Android 4.3. To launch it, Settings and About Phone need to be tapped. Be sure to play a bit with all that the OS offers.
If, at the end of the experimentation, you don’t enjoy the goodies, you can go back and retrieve the previous ROM. This is why a NANDroid backup had to be created. Use the NANDroid backup file for this phase. But you should know that the update will be revoked once this method’s been used.
You can leave comments and questions about the procedure below this tutorial!


