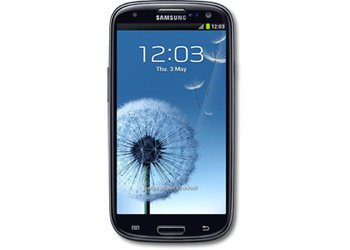
Update Galaxy S3 LTE GT-I9305N to Android 4.1.2 XXBMH1 Stock Firmware
The smartphone variant which is going to end up updated today, to none other than Android 4.1.2, is Galaxy S3 LTE GT-I9305N. This model is going to deal with XXBMH1 official firmware released in August this year for Sweden and Finland.
The actual release date of the Galaxy S3 I9305N is September 2012. If you own the version that already comes with a custom ROM, you can upgrade the device by opting for one of these methods: either Samsung’s KIES (since the new firmware has the KIES logo activated), our guide or OTA (over the air).
Once our tutorial is the method you selected to update your smartphone to the newest Jelly Bean OS, you have to know that the important data, as well as the phone’s internal and external SD cards, will stay intact. The only shortcomings we need to report: after the update is performed, and if your handset is rooted, the system partition will be erased and the root access will be revoked.
Even so, there are many new features to compensate for the loss: a fixed frame of 60 fps, sync and connect email updates, triple buffering, all share, mini apps, a new keyboard, group cast, pop up play, extended vsync timing, automatic adjustment for the size of widgets, Google Now, touch anticipation and free style widget. 
Requirements
Having shared with you the pros and cons of having the Android 4.1.2 XXUBMH1 official firmware on the Galaxy S3 LTE GT-I9305N, you’re now on the way to get the actual firmware. First, follow the next set of requirements:
- create backups (a standard one and then also a full NANDroid one via these instructions);
- if the handset’s battery levels tell you that you must charge your battery unit, do that;
- locate the option known as USB Debugging and turn it;
- disable, on both the phone and notebook or PC, those particular programs that make sure your devices are well protected against security threats;
- your PC or laptop must run Windows;
- download and install, from this page, the USB drivers fit for your handset.
Instructions
- Once you’ve completed each of the tasks below, you should begin the tutorial with the following actions: download, on your laptop, the Jelly Bean 4.1.2 XXBMH1 (the Sweden version of the firmware from and the Finland version ), then Odin from this place and after you wait for these packages to be saved on the notebook.
- After this process, you should also unzip them and then boot the handset in Download Mode (by pressing and simultaneously holding Volume Down, Home and Power and, when the logo of Samsung appears, let go of these buttons).
- After these first couple of tasks, you should launch the Odin, on your laptop, as an Administrator and then make use of the handset’s USB cable to make sure a connection begins to establish itself between the smartphone and the notebook.
- When the plugging has been done, a yellow ID:COM box along with a message saying “Added!!” will make an appearance of the display; in case they don’t, try to establish the connection by flashing the USB drivers again or using a USB port that’s not the same as the one used thus far.
- Next task to perform tells you to tap on PDA, choose, next, a file with CODE in the name, click on Phone, choose a file with MODEM in the name, tap CSC, then be sure to opt for a file with CSC in the name, click on PIT and choose a file whose extension should end in .pit.
- [sc name=”banner-jos”]If you are done with this part, you can opt for these three boxes: Auto Reboot, Re-partition and F. Reset Time. When you’ve activated each and every one of them, tap “Start” and the Android 4.1.2 XXBMH1 stock firmware will start its installation stage.
- When your Samsung I9305N restarts and then displays a message that reads “Pass“, you can unplug the device from your PC or notebook and then open Settings, choose About Phone and lose yourself in the new firmware’s many and varied advantages that only an upgrade can deliver.
If you crave the handset’s previous ROM, you should restore it by revoking the update process like this: find the NANDroid backup file you created and use it. Did something bad happen during the update? Ask questions below!


