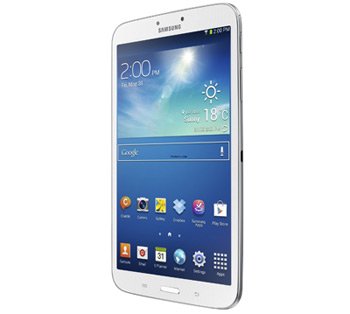
How to Update Galaxy Tab 3 7.0 SM-T211 to Android 4.1.2 UBAMH3
Your Galaxy Tab 3 7.0 SM-T211 is on the way to achieving Android 4.1.2. The tool which is going to give a helping hand is this: UBAMH3.
Since this month saw the release of the new firmware for Brazil (O1 and Claro), how about you find out how to update your tablet to the latest Android OS? If you can’t wait for the tutorial to begin, there are some things we have to warn you about: the new official firmware will erase the system partition and revoke the root access of your gadget. If you don’t use the new firmware on this model, you will brick the other model you may own.
Even so, the upgrade is worth it. The important data and the internal/external SD cards won’t be damaged and you will gain access to these goodies: a fixed frame of 60 fps, group cast, Google Now, sync and connect email updates, all share, pop up play, extended Vsync timing, automatic adjustment for the size of widgets, a whole new keyboard to use during your day-to-day activities, touch anticipation, mini apps, free style widget and triple buffering.
There is an activated KIES logo coming with the UBAMH3. Which translates into this: if you want to, you can update the tablet via Samsung’s KIES. Your device, though, needs a stock ROM if you wish to use this method.
Requirements
We need you to do this before you start the update:
- if the battery of your tablet is weak, fully charge it;
- there are USB drivers you need to download on your laptop (be sure to find the ones compatible with your tablet);
- if there are security programs turned on on your tablet and notebook, they need to be disabled while the tutorial is going on;
- make two sets of backups (one of which should be a full NANDroid one and the other a regular backup);
- don’t use a laptop which doesn’t ship with Windows;
- enable the option called USB Debugging on your Galaxy Tab 3 7.0 SM-T211.

Step by step instructions
- The beginning of this tutorial deals with these tasks: download Odin v3.09.exe and the Jelly Bean 4.1.2 UBAMH3 official firmware (the compatible file for Brazil O1 and for Claro is ) and Odin on your notebook. You should then proceed to extracting the packages you just saved on your laptop; for the unzipping, you can use 7Zip or WinRar.
- Next step to perform will need you to enter the Samsung SM-T211 in Download Mode by simultaneously pressing and holding Volume Down, Home and Power; do that till you spot the logo of Android and a warning display, which means that you should press Volume Up next.
- If all of this is done, you need to launch the Odin on the laptop as an Admin and then make a connection between the tablet and the laptop with the gadget’s USB cable.
- You will, once the connection is established, see an ID:COM box in yellow along with a message reading “Added!!”. If you don’t, you should proceed to installing, once more, the USB drivers on the notebook or using another USB port.
- At the end of these tasks, you will have to tap BL next, select a file with BL in the name, click on AP, opt for a file with AP in the name, tap CP, opt for a file with CP in its name, tap CSC, choose a file which has CSC in the name, tap PIT and choose a file with an extension called .pit.
- What should be done now is as follows: check Re-partition, F. Reset Time and Auto Reboot. As soon as you’ve activated these boxes, you need to start the flashing of the new Jelly Bean 4.1.2 firmware. To do that, tap “Start” and have patience till the installation ends.
- When it’s finished, we recommend you to wait for the tablet to restart and for its screen to show this message: “Pass” (in a green-colored background).
- [sc name=”banner-jos”]Time now to perform this action: unplug the Galaxy Tab 3 7.0 SM-T211 from the laptop and launch the new firmware. Which can be located if you do this: after tapping Settings, make sure you click on About Tablet.
If the new UBAMH3 fails to keep you entertained and you miss the previous ROM, our advice is to return to the NANDroid backup file. By using it, the old ROM shall be returned to your tablet. However, the update procedure will be revoked.
We will answer your comments and questions if you leave them in the section below this post. Don’t be afraid to use it!


