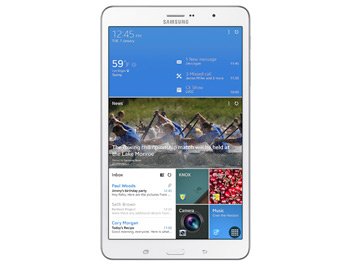
How to Update Galaxy Tab Pro 8.4 SM-T325 to Android 4.4.2 XXU1BNE7
Galaxy Tab Pro 8.4 (LTE) SM-T325 is the newest tablet to join our list of updated gadgets. If you’re interested in such a procedure, you can do it yourself with our steps!
The first thing you should know about upgrading your tablet: it must be the Galaxy Tab Pro 8.4 SM-T325 version. You risk damaging another model if you update it with our firmware.
Speaking of which: you’ll use Android 4.4.2 XXU1BNE7 to upgrade your gadget. This firmware came out officially this June for Russia. Your device will see it after you perform some steps. They will appear later on.
The update firmware we selected comes with several goodies that your tablet badly needs. All of them are necessary. Without them your gadget won’t perform in a superior way. And it won’t enjoy new stuff.
If you’re using the right model, the latter will come up with new features. They are joined by new apps. In the mix are also the following: customization options. Apart from this array of novelties, you’ll have battery options to end up with longer battery life. All of these combines will definitely help your tablet achieve much better performance on the whole.
The novelties
You should consider the following: if the update method you love to use is Samsung’s KIES, the new firmware allows you to use it. Be careful: the only way you can opt for this method is if your tablet’s owning stock ROM. Should the device not be running this ROM, you can go and upgrade the tablet with our tutorial.
If you’re considering an upgrade for a rooted tablet, some risks will come with this. They’ll mess with the system partition and root access, respectively. The first will be erased and the second will end up revoked. Don’t expect deleted data or damaged internal / external SD cards. The two will come out safe from this procedure.
Prerequisites
What you need to focus on now is important. Below are the requirements you have to follow to make sure everything goes well:
- download, by going here, USB drivers on your notebook;
- the notebook’s operating system must be Windows;
- your Samsung T325 will need to have its security software deactivated;
- deactivate, next, the notebook’s security software;
- the battery which comes with your tablet will have to be fully charged;
- create some protection for your tablet’s data via a bunch of normal backups;
- perform a full NANDroid backup;
- have your tablet’s USB Debugging option activated.
Step by step instructions
- You need two files for this update. They must be downloaded on the laptop. Odin v3.09 (from this page) and official firmware are these packages.
- Once each of them is on your laptop, they must be unzipped. If you don’t know what to use here: either WinRar or 7Zip is fine.
- What is delivered by the extraction is, among many others, this file: Odin v3.09.exe. You have to launch it on your notebook and prepare to enter the tablet in Download Mode.
- You’ll have to enter in this mode with the following method: press and hold Home, Power and Volume Down together, let go once you see a boot message and press Volume Up.
- A connection is needed between the tablet and your notebook. If you use the gadget’s USB cord, you’ll end up with two connected devices. If you don’t, repeat this again.
- In case the plugging works and the Odin comes up with a blue sign on the display, you can add the firmware file to AP / PDA. For this next stage you’ll have to check two boxes and uncheck a third one.
- The two boxes that must be activated are these: F. Reset Time and Auto Reboot. The box you need to tick off is Re-partition.
- Now tap “Start“. The KitKat 4.4.2 XXU1BNE7 stock firmware will begin its proper installation on your tablet. Once a message saying “Pass” in a green background pops up for you, then wait for the gadget to reboot itself.
- [sc name=”banner-jos”]Unplug, for the next step, the Galaxy Tab Pro 8.4 (LTE) SM-T325 from the laptop. Taking the USB cord out is the way to go for this.
- You can now tap Settings, then About Tablet and then you’ll have free access to the goodies we told you to look forward to!
If you want to use your tablet with its old ROM, use the NANDroid backup file. The upgrade shall be revoked if you take this road.
To solve your problems about this procedure, we’re asking you to leave your questions below.


