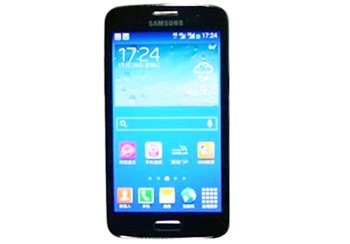
How to Install Android 4.2.2 XWUANG1 on Galaxy Core LTE SM-G386F
If you combine Galaxy Core LTE SM-G386F with Android 4.2.2 XWUANG1, the phone will give you plenty of reason to celebrate. You should perform an update only via a guide which caters to your device’s model. In this case, ours. Below are all the steps that will eventually bring great goodies for your smartphone!
The Android 4.2.2 jelly Bean XWUANG1 is tailored to your handset model. Which, as mentioned, is the Galaxy Core LTE SM-G386F. No other device will work with this particular official firmware. Which, by the way, came out this month for France. With an activated KIES logo, might we add. A KIES logo that’s turned on is good news. It means that you can get an update with the KIES software. This option has to be selected if stock ROM’s installed on your handset.
The benefits of this official firmware
The new firmware your handset will welcome soon contains a very generous set of novelties. Their aim: to make your device better from various points of view. Here is the batch of goodies. The update lets you enjoy low battery bug fixes first. Then it allows you to experience a USB debug white-list, too. Not to mention improved Bluetooth audio streaming.
The new stuff also means the option to long-press the WiFi Bluetooth icons in Quick Settings to be able to toggle the on/off state while using the device. The phone is going to see what it can do with a new Gallery app, too. The goodies are also joined by a new set of download notifications. They include new features and a new set of sounds for wireless charging.
You will be able to do a lot with your updated device. But you will be asked to give certain stuff up. Especially if the upgrade’s performed on a rooted Galaxy Core G386F. If it is, then you’ll no longer enjoy its system partition or its root access.
An upgrade procedure doesn’t make you lose other important elements. The handset’s data and its internal / external SD cards, for instance, will not face damage.
Prerequisites
What you need to do now is apply these guidelines:
- generate one (or several) standard backups to save the data on your phone;
- the security programs that are on your phone must be disabled;
- the security programs pre-installed on your notebook should also be turned off;
- the Samsung SM-G386F should run with an activated USB Debugging;
- download USB drivers from here on the notebook;
- Windows has to be the OS in use on the notebook;
- go and fully charge the battery of your smartphone;
- a full NANDroid backup should be created now.
Step by step instructions
When the pre-requisites are applied, you have to perform some steps. They’ll help the phone get updated!
- How else to start the guide than by downloading the on your laptop (file name: G386FXWUANG1_G386FXEFANG1_XEF.zip).
- Download Odin 3.09 from this page on the notebook, as well, then unzip it. The same should happen to the other package. To extract the two, 7Zip or WinRar can be used.
- For the next step, find and open, on your notebook, this: Odin v3.09.exe. The smartphone must then enter Download Mode. To be booted into this, the device should go through these actions: press and hold Home, Power and Volume Down together until a boot message pops up, then press Volume Up instead.
- You will then be required to connect the phone to the notebook. Helping you with that is the handset’s USB cable. Odin should have a blue sign to reveal in a couple of minutes.
- If you see that, get a move on to the next step. This one asks you to add the firmware file to AP / PDA. The action to come up next: activate F. Reset Time and uncheck Re-partition.
- Enable Auto Reboot and tap “Start“. This is where the installation of the new firmware begins. You need to let this process end before moving on.
- The end will be in sight once you see a message saying “Pass”. This message will give way to your handset rebooting afterwards.
- [sc name=”banner-jos”]Which should tell you that you can now disconnect the handset from your notebook. The unplugging has to happen as shown here: go to the USB cord and remove it.
- Settings and About Phone need to be tapped after you are done with the unplugging. If you are, nothing’s stopping you from opening the new stuff and giving it a spin.
Then, if you can’t wait to restore the old ROM, use the NANDroid backup file. By choosing this method, the update of your Samsung SM-G386F will be revoked.
If you have something to comment or ask us, use the comment section under our post.


