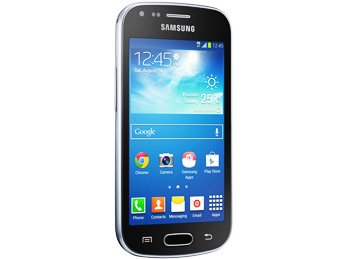
How to Flash Android 4.2.2 XXUBNE4 on Galaxy Trend Plus S7580
Galaxy Trend Plus S7580 will enjoy the most recent Android 4.2.2 version available. New firmware Android 4.2.2 XXUBNE4 has just become available for your phone. You’ll be able to see it work wonders on the device!
The smartphone which you must use for the tutorial today is the Galaxy Trend Plus GT-S7580. The Android 4.2.2 Jelly Bean XXUBNE4 is out for Spain this month. You have to use this guide or OTA for the update; the KIES method can’t be used as there’s no KIES logo activated for this procedure. To enjoy a successful upgrade, the smartphone must have stock ROM if you go for the OTA tool.
The improvements
Don’t go for a different handset; this new firmware is going to brick it. Once the right model is updated with the new firmware, you’ll have a new Gallery app and a USB debug white-list to play with. But your phone will get to enjoy other goodies, too.
Here they are: low battery bug fixes and a new set of sounds for wireless charging. Novelties also include a new set of download notifications. Bluetooth audio streaming has been improved, too. As a user of an updated phone you will also get the option to long-press the WiFi Bluetooth icons in Quick Settings in order to be able to toggle the on/off state.
If you want an upgraded handset even if root access is on the phone, you’ll have to give some things up. They’re your handset’s root access and its system partition. Each of these will be damaged by the procedure. The damage won’t extend to the data and internal / external SD cards of the device.
Prerequisites
Requirements are an important part of the update. Perform them as shown below:
- in case the security programs of your smartphone are running, turn them off for this upgrade;
- turn off the ones which are on the notebook;
- your notebook’s operating system must be Windows;
- install, on your notebook, USB drivers which were made for your Samsung S7580;
- create a bunch of standard backups;
- create a full NANDroid backup, using the instructions from this tutorial;
- your phone’s battery must be fully charged for the procedure;
- enable USB Debugging on your phone.
Step by step instructions
There are certain steps you have to follow from now on.
- The one that begins the upgrade is this: download the (file name: S7580XXUBNE4_S7580PHEBNE1_PHE.zip) on your notebook. To move on, you should also download this file on the latter device: Odin v3.09.
- These packages’ content has to end up on the notebook. So you need to use 7Zip and extract them both there. Some files will be delivered on the notebook. Odin v3.09.exe is one of them and it must be launched on the device.
- Go on by entering the Galaxy Trend Plus S7580 in Download Mode. This should be done in a certain way as shown here: press and hold Home, Power and Volume Down together, let go of them once a boot message pops up and press Volume Up after that message appears.
- Your smartphone and notebook have to enter a connection now. The handset’s USB cable is what you should use for the plugging.
- Then Odin will have a look for the phone. It will display a blue sign after it finds it. You can afterwards do the following: add the firmware file to AP / PDA.
- Your job next is this one: activate Auto Reboot and uncheck Re-partition. Move on to this action now: check F. Reset Time. To install the update firmware, tap the option called “Start“.
- [sc name=”banner-jos”]The flashing will happen after tapping on that. If you see, after 15 minutes, a “Pass” message on your screen and the Samsung S7580 reboots, you’ll know that the waiting is over; and that your device is an updated one at last.
- Take care of the following final steps: disconnect the devices from one another and tap Settings followed by About Phone. To unplug the two, it’s necessary that you remove the USB cable from them.
The update may leave you wanting the old ROM back. Should you desire that, use the NANDroid backup file. If you go for this method, you will soon lose the phone’s update procedure.
If the procedure is difficult to perform and you’re stuck at some point, make sure you leave questions below this post!


