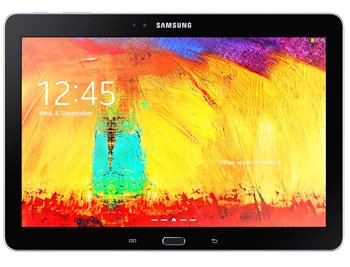
Update Galaxy Note 10.1 WiFi SM-P602 to Android 4.3 JVUAMJ4
Today our main point of focus is Galaxy Note 10.1 WiFi SM-P602 2014 edition and how to get JVUAMJ4 installed on it. That way, you will fully enjoy the benefits of Android 4.3.
Considering the new official firmware came out recently, last month to be precise, your tablet will get the best out the Jelly Bean 4.3 right away. But first, you will need to make sure you’re using the Galaxy Note 10.1 WiFi SM-P602. If you perform this guide on another model, you will brick it for sure. Also, keep in mind that the new firmware will only work on your device if you’re living in Turkey.
What goodies are there when it comes to the new Android OS, you ask? Here is what you will be able to experience: numerous tweaks to help you personalize your device, much improved battery life, a whole list of new apps, enhanced performance and also new features, plus no more bugs.
The new firmware doesn’t have an activated KIES logo, which is why you should update your tablet either with our tutorial or via OTA (over the air) with the Software Update button under Settings menu.
Your gadget must be running a stock ROM if you plan on using the latter solution. Moreover, you should know that the new stock ROM comes with the following cons (should your device have root access): the system partition will be deleted and root access will become revoked.
Even with these disadvantages, you can rest assured knowing that the important data and the internal/external SD cards will not be affected.
Requirements
Before we start the upgrade, you will have to pay attention to these pre-requisites:
- make a regular backup and a full NANDroid one, via these instructions;
- make sure you disable all of the tablet’s and notebook’s security programs alike;
- charge the battery of the tablet in case you notice low charge levels;
- you must install USB drivers compatible with your tablet on the notebook;
- enable, on your gadget, the option known as USB Debugging;
- the laptop you use with this guide must have a pre-installed Windows.
Step by step instructions
- If you are done with the instructions above, you should download these files on your notebook, then extract them: the Android 4.3 JVUAMJ4 (the Turkey version ) and Odin (from this page).
- After you’ve extracted their content via WinRar (or WinZip), you can boot the tablet in Download Mode like this: press and hold, together, Volume Down + Home + Power, then wait for Android’s icon (together with a screen of warning) to appear; when it does, time to press Volume Up.
- The next step to perform will ask you to do this: open, on your laptop, the Odin as an Admin. For the following step, you will have to plug, with the tablet’s USB cable, the Galaxy Note 10.1 WiFi SM-P602 to your notebook.
- The connection between the two devices won’t happen unless an ID:COM in yellow and an “Added!!” message pop up on the screen. If there’s no sign of them nowhere, you have to do the following: choose a different USB port or install the USB drivers on your laptop until the plugging is successful.
- You should see an AP button; choose it.
- Then go on by applying these guidelines: tap PDA, opt for a file with CODE in the name, click on Tablet, choose a file having MODEM in the name, tap CSC, select a file with CSC in the name, tap PIT and then opt for a file which will have a .pit extension in it.
- Continue the guide by checking Re-partition, F. Reset Time and Auto Reboot. Move on by tapping “Start” and then wait till the new firmware is installed. When the flashing is all done, the tablet is going to reboot.
- You will then have to wait once more until the tablet’s display shows up with “Pass“. Once this message is displayed, you can finally unplug the tablet from the laptop by taking the USB cord out.
- [sc name=”banner-jos”]At this point, the new firmware is located in your gadget’s About Tablet. To find it quickly, be sure to tap Settings first.
Now that you know exactly where the JVUAMJ4 is, test it out on your Samsung P602. If you don’t think it’s worth your time, you have to use the NANDroid backup file in case you want to restore the old ROM. The upgrade process will be revoked once you do that, so think twice about this.
Is there something you want to ask us? Kindly use the comment section below and we will get back at you!


