How to Update Galaxy S Duos 2 GT-S7582 to KitKat 4.2.2 DDUAND1
The best thing that can happen to Galaxy S Duos 2 GT-S7582 is Android 4.2.2. If you’re wondering how to get it for your handset, an update is your best bet.
We recently stumbled across this new official firmware: DDUAND1. It has been available for India ever since this month. To give it a go, you have to own the Samsung S7582 instead of an altogether different smartphone. Which can be bricked if used with the wrong firmware.
KIES is not to be used for the upgrade. The new ROM isn’t equipped with an enabled KIES logo. To install the firmware, choose our guide or OTA. The second option demands the presence of stock ROM on your smartphone.
The new OS is going to damage certain parts of your handset if it’s rooted. Root access is the first to go through said damage because it will be revoked. The device won’t end up with deleted data, but it will see its system partition erased. Also, nothing bad is going to happen to the phone’s internal and external SD cards.
The Galaxy S Duos 2 GT-S7582 is going to feature a new set of sounds for wireless charging. Sporting an Android 4.2.2 also means you get to enjoy the option of long-pressing the WiFi Bluetooth icons in Quick Settings in order to be able to toggle the on/off state. The OS will deliver, among others, better Bluetooth audio streaming and low battery bug fixes. A new set of download notifications and a new Gallery app are featured, too. A USB debug white-list completes the list of novelties.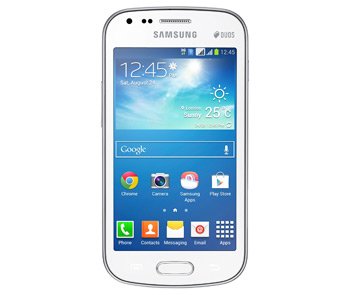
Prerequisites
A good idea now is to perform the following:
- deactivate those security programs enabled on your phone;
- deactivate the ones that come with the notebook, too;
- prepare a laptop that’s equipped with Windows;
- the notebook needs USB drivers, so download them from this place;
- one or more normal backups must be created;
- a full NANDroid backup needs to also be performed;
- charge, if needed, the battery of your GT-S7582;
- like any other device, your phone’s USB Debugging must be turned on.
Step by step instructions
The above instructions work as requirements. They prepare your handset for what’s to come.
- When you’re done with each of them, start the download of the and Odin v3.09 from this page. These are the packages that must feature on your notebook.
- When they’re both downloaded and saved on it, go on by unzipping each of them with the same tool: either WinZip or WinRar. By the time you’re done with the extraction, Odin v3.09.exe and many other files will have been featured on the laptop.
- Your task is to open the Odin v3.o9.exe on the latter, then perform some steps to restart the handset in Download Mode. Here they are: press and hold, at the same time, Home, Power and Volume Down, release all of these buttons as soon as a boot message is delivered, after which you should press Volume Up.
- Then take a hold of the phone’s USB cable and use it to establish a connection between this device and the notebook. The Odin should go looking for the handset after you do that.
- When you spot a sign in blue, your phone and the laptop will have finally achieved a connection. So you can now add the firmware file to AP / PDA and after that do as follows: check both Auto Reboot and F. Reset Time. “Start“ is the name of the option that can debut the flashing of the update firmware.
- Make sure it’s tapped, then have some patience. Pretty soon, the DDUAND1 official firmware will appear on your Galaxy S Duos 2 GT-S7582. A message reading “Pass” will come up on-screen after 10-15 minutes. This message is going to be followed soon by your phone doing this: restarting.
- When the handset is done with its rebooting phase, it will have to be disconnected from the notebook. The USB cord that connected it to the latter needs to be taken out.
- [sc name=”banner-jos”]Now you are able to go to the smartphone and tap the following options there: Settings and About Phone. This is the way to launch, on your handset, the Jelly Bean 4.2.2 DDUAND1.
If the options, features and whatnot don’t appeal to you, the old ROM can easily be restored. Simply find the NANDroid backup file and make good use of it. Having the former ROM back on the phone will leave the latter without the upgrade.
We have, under today’s post, a comment section for your questions.


