Update Galaxy Tab 3 8.0 SM-T311 WiFi to Jelly Bean 4.2.2 XXUANA2
Galaxy Tab 3 8.0 (WiFi) SM-T311 is a tablet that first came out last year in the summer. It features an OS that isn’t updated. But by reading this tutorial, you will get access to the most recent Android version that came out in February.
Because this model was missing the latest Android 4.2.2 Jelly Bean version, we are coming in your aid. Today we’ll introduce this OS and the way to get it on your tablet.
Our help is called XXUANA2 and, if you live in Poland, you will get to install it straight away with our guide. If you don’t want to follow a tutorial and prefer to opt for KIES, the new firmware lets you use this method. For that, though, the gadget must sport stock ROM.
Our guide can only be followed by readers who own the Galaxy Tab 3 8.0 SM-T311 WiFi. If you’re not one of the people who use this model, look for a different tutorial.
The Android 4.2.2 will, with the help of the new firmware, allow for various new features to appear on your tablet. All of them will deliver ways to improve the performance of your device, starting from its battery, going through customization options and ending with many novelties.
Here is what these goodies sound like: a new set of download notifications, better Bluetooth audio streaming and a new set of sounds for wireless charging. There are other things to look forward to: low battery bug fixes, a USB debug white-list, the option of long-pressing the WiFi Bluetooth icons in Quick Settings in order to be able to toggle the on/off state and a new Gallery app.
Every time a rooted gadget gets updated, it risks losing several important things. Take the Galaxy Tab 3 8.0 SM-T311, for instance: its root access will be revoked and the system partition will be deleted. The upgrade won’t take away the internal or external SD cards; the tablet’s most important data won’t be erased.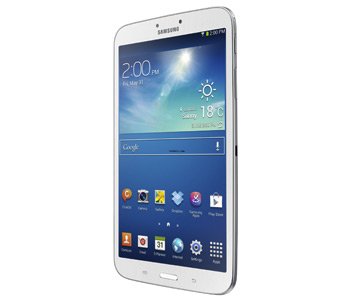
Prerequisites
Our requirements ask you to:
- a backup must be created to make sure nothing important gets lost during the update;
- follow this backup up with a full NANDroid backup, generated with this tutorial;
- the tablet’s battery must be charged;
- we recommend a deactivation of your tablet’s and then your laptop’s security software;
- we suggest turning on your tablet’s USB Debugging option;
- to install USB drivers compatible with the Samsung SM-T311 on your laptop, go here to find them;
- only a notebook with Windows installed on it must be used.
Step-by-step instructions
- Start the update with this: download, on your notebook, the , then Odin v3.09 by heading over here. After you extract both of these on the notebook with WinZip, we recommend opening the Odin v3.09.
- After you’re done with that, boot your tablet in Download Mode by pressing and holding Home, Power and Volume Down at the same time, then have patience until you come across a boot screen, which means you should press Volume up next.
- When you’re done with this, as well, turn to our other task which tells you to use the USB cable to enable a connection between the tablet and the notebook.
- Should the Odin deliver a sign colored in blue, a connection has just been made between the laptop and your Galaxy Tab 3 8.0 T311. After the plugging’s gone well, time for a different action: add the firmware file to AP / PDA.
- Then, when a bunch of boxes with various names appear on the screen, activate only two of them. They are called Auto Reboot and F. Reset Time, respectively. If they are activated, move on to the next step. Before that, however, deactivate Re-partition should you see that it’s checked by default.
- Tap “Start” for the next task, then allow yourself around 10 minutes of waiting. While you wait, the XXUANA2 will install itself on your tablet.
- [sc name=”banner-jos”]After those 10 minutes are up, the Galaxy Tab 3 8.0 SM-T311 WiFi will present a message saying “Pass” in green. Only after that happens will your tablet be able to automatically reboot. Now you should perform the last step: disconnect the devices from each other.
Now sit back and enjoy the XXUANA2. If you are clueless about how to launch the firmware: tap Settings, click on About Tablet and that’s all.
If this new firmware isn’t what it’s cracked to be, we suggest doing this in order to retrieve the old ROM: make use of the NANDroid backup file.
We are ready for your questions now. Simply leave them in our comment box below!


