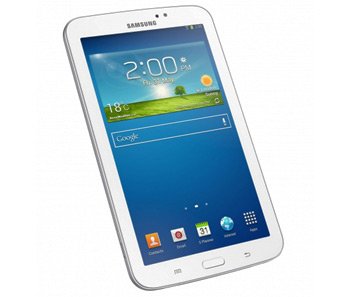
How to Flash Jelly Bean 4.2.2 XXUANB3 on Galaxy Tab 3 Lite SM-T110
Galaxy Tab 3 Lite SM-T110 has already been added to our list of tablets featuring Android 4.2.2. You can update it to this OS via another new firmware, not just the one we discussed in an older post.
The new Jelly Bean is now available for your Samsung T110, the Australian version. It’s all thanks to new firmware called XXUANB3 and released this month.
If this is your first time with an update, there are some important things to consider. The first of them: a rooted tablet will be affected by the new OS. In other words: you will lose it. The tablet’s system partition will be deleted. Your gadget’s internal / external SD cards and data won’t be damaged. The second important thing to keep in mind: the new firmware is only fit for the Galaxy Tab 3 Lite SM-T110.
The novelties
Before you install this particular firmware, it should be said that its KIES logo is deactivated. In such a case, you are left with some alternate ways of grabbing the update: this tutorial or OTA (over-the-air). When you opt for the second way, you will have to perform the update with a tablet that is running this: stock ROM.
You will meet up with great assets once the update is over. Like an improved Bluetooth audio streaming, a USB debug white-list and a new Gallery app. These are completed by a new set of download notifications and low battery bug fixes. You also have a great option of long-pressing the WiFi Bluetooth icons in Quick Settings in order to be able to toggle the on/off state. A new set of sounds for wireless charging is included, too. 
Prerequisites
Now off to these requirements which need to be completed:
- you need to keep the tablet’s data safe from harm by creating backups;
- apart from a regular backup, it’s best to also make a full NANDroid one;
- turn off the laptop’s security software;
- also, make sure your tablet’s security software is disabled;
- the battery on your device needs to be charged;
- the option called USB Debugging on the tablet must be turned on;
- download USB drivers on your laptop for the tablet;
- your laptop’s operating system needs to be Windows.
Step by step instructions
As for what you should do next, the following steps will tell you everything there is to know.
- The first of them requires the download of some packages on your laptop. The first one is called Odin v3.09 and it’s located on this particular site. The second package is named Android 4.2.2 XXUANB3 official firmware and is .
- They must be extracted next, and then you have to open this one on your laptop: Odin v3.09.exe.
- After the appropriate file’s been launched on that device, the tablet needs to reach Download Mode. That’s easy to perform: simply press and hold Home, Power and Volume Down together. The second action: do that till a boot message is available on the display, then just press Volume Up.
- In order to continue, your tablet must be connected to your notebook with its USB cable. The Odin will, once some minutes are up, display a sign whose color should be blue. If it is, you can move on to the step asking you this: add the firmware file to AP / PDA.
- Once this is done, you have to check two important boxes by the names of F. Reset Time and Auto Reboot. Click on “Start” after you uncheck Re-partition.
- The next 11 or so minutes are dedicated to the flashing of the XXUANB3 on your Galaxy Tab 3 Lite SM-T110. To know if the installation is successful, wait until the tablet has “Pass” in green on its display and restarts soon after. When these two signs are displayed, you can disconnect the tablet from the laptop.
- [sc name=”banner-jos”]You will then be given the opportunity of checking the new OS out. But that should only happen after you do as follows: tap Settings, then tap About Tablet. After having followed these indications, you’re ready to explore the novelties of the Android 4.2.2 Jelly Bean.
Should you wish for the previous ROM to be restored on your Galaxy Tab 3 Lite SM-T110, the NANDroid backup file will help you get it back.
You can leave comments or questions in the box located under our post.


