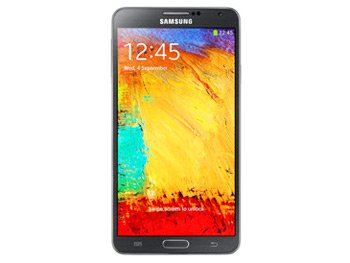
How to Flash KitKat 4.4.2 XXUDND2 on Galaxy Note 3 SM-N9000Q
You can try and upgrade your Galaxy Note 3 SM-N9000Q to an improved Android version. The tool to help you with this process has just come out for your country. More on this below.
The upgrade we deliver today is based on newly launched Android 4.4.2 KitKat XXUDND2. The firmware which brings the upgrade came out for Turkey this past April. After you get it on your smartphone, you’ll be introduced to new things. All of them improve the general performance of your device. That’s possible thanks to customization options, new apps, battery tweaks and much more!
The improvements
These advantages of owning an updated device will materialize only if the Samsung N9000Q is used. If, however, a random device is upgraded with today’s firmware, your product has every chance of being damaged. So keep in mind this: never use our upgrade tutorial on another device. Stick to your own smartphone and everything will be fine.
As is the case with an upgrade being performed on a rooted device, your phone will also have to suffer from the usual cons. In case you don’t know about them, they’re the following: root access will be revoked and the system partition will be deleted. The phone’s data and internal / external SD cards will never share the fate of the previous elements we just mentioned!
Prerequisites
Here’s what you must do before you install the new firmware on your Galaxy Note 3 SM-N9000Q:
- your phone’s battery has to be fully charged;
- create some backups to keep the phone’s important data safe;
- generate a full NANDroid backup afterwards;
- this update needs a laptop which has Windows as the main operating system;
- your laptop’s security software must be disabled for this update;
- the security software your SM-N9000Q is pre-installed with has to also be turned off;
- there are USB drivers for your phone on this page;
- download them on the laptop;
- the handset’s USB Debugging must always be activated.
Step by step instructions
After the pre-requisites we indicated are completed, you can start the upgrade.
- For the first step, do this: download the on your notebook. Then it’s time for this file to be downloaded on that device: Odin v3.09. The next step to perform asks you to extract what you just downloaded; WinRar or WinZip will have to be used for this part.
- After certain files will be unzipped on your notebook, Odin v3.09.exe will need to be launched on it. If this file is up and running on the laptop, time for this: restart your phone in Download Mode.
- As usual, do it like this: after you press and hold Home, Power and Volume Down simultaneously, a boot message is going to come up; press Volume Up once it does, then you’re ready for the next phase.
- Which phase has to go like this: plug, with the phone’s USB cord, the Galaxy Note 3 SM-N9000Q to the laptop and wait for a sign of a successful plugging. Which sign will be offered by Odin; the latter will soon have a blue sign to reveal.
- After the products have entered a successful plugging, get ready for this step: add the firmware file to AP / PDA. For this to be completed, several boxes have to be uncheck and one of them must be unchecked.
- The ones to activate are F. Reset Time and Auto Reboot. The one to be unchecked is this: Re-partition. You can begin the flashing of the Android 4.4.2 XXUDND2 firmware as such: tap “Start“.
- A message will be delivered on the screen in a green background; here it is: “Pass”. After that, the smartphone will go into a rebooting state. When the restarting is over, you have to move on to the last part of our guide.
- [sc name=”banner-jos”]This is what you need to do now: unplug the notebook and the phone by extracting the USB cord. The smartphone will then have the new firmware; to open it, tap Settings and About Phone.
If the update isn’t that big of a deal and you’re after the old ROM, the NANDroid backup file will come in handy. But it will also revoke the upgrade.
We are here to answer your questions if you didn’t understand our guide. Drop them in the box below this tutorial!


