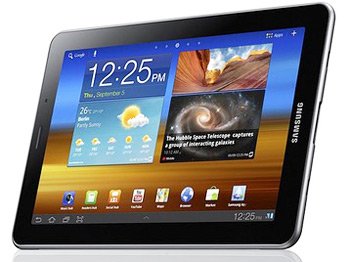
Update Galaxy Tab 7.7 GT-P6810 to Android 4.0.4 XXLPS Official Firmware
Android 4.0.4 XXLPS official firmware is what your Galaxy Tab 7.7 GT-P6810 will be running if you opt for our guide. Along with this OS you will have the opportunity to have a go at the options, features and so on which only this version can provide.
Here is a list of what awaits your tablet after you update it: phone number recognition that works better, improved camera, superior stability, better screen rotation, no bugs and longer battery life. October 2013 is the date when the Android 4.0.4 ICS was released for this tablet (Spain region only). The Galaxy Tab 7.7 P6810 was launched by its manufacturer last year in January.
The new firmware can be flashed on your tablet after you follow our very important update steps. Before them, you will have to comply with some requirements, but till we get to them we must tell you something else: the new firmware has its KIES logo activated, which means that you can upgrade your gadget with Samsung’s KIES besides this guide or OTA (with the Software Update button located under Settings menu), the root access of your device will be revoked and the system partition will also suffer.
If, however, you update your tablet with today’s tool, you will get to keep your tablet’s important data and the internal / external SD card won’t be damaged in the process.
Requirements
Now for the pre-requisites we promised earlier:
- use only the Galaxy Tab 7.7 P6810 (otherwise you will end up with a bricked gadget);
- download and Odin tool from here on your laptop;
- turn USB Debugging on;
- find USB drivers compatible with your device and flash them on your laptop;
- charge the tablet’s battery;
- disable the laptop’s and tablet’s security programs for this guide;
- create a backup (which must be a standard one and a full NANDroid one);
- your laptop must use only Windows.

Instructions
All done with the first few paragraphs of our update guide. Here comes the part that has the steps which make the procedure easy to achieve.
- The first action we need you to perform tells you the following: unzip both the Ice Cream Sandwich 4.0.4 XXLPS and the Odin on your notebook.
- The second step to make happen goes like this: enter the P6810 in Download Mode, which is done by pressing and simultaneously holding the keys called Volume Down and Power and then pressing Volume Up.
- This should get you in that Download Mode and, when you see it, we advise you to move on to the next task: launch, on your laptop, the Odin as Admin.
- When you’ve done this, you should follow up by plugging your two devices to one another via the USB cable that comes with the Galaxy Tab 7.7.
- In a very short while you will observe these two signs of a successful connection: an “Added!!” message together with a yellow ID:COM box. If no connection between the tablet and the laptop has been established, you have to install the USB drivers once more or use another USB port.
- But should there already be a connection achieved, you need to continue with these tasks: tap PDA, look for a file with CODE in the name, opt for it, tap Phone, locate a file with MODEM in the name, choose it, then tap CSC, search a file with CSC in the name, tap PIT and choose a file that should have a .pit extension.
- Once done with these actions, we recommend you to perform the following instruction: check Auto Reboot, Re-partition and afterwards F. Reset Time.
- Tap “Start” at the end of the previous task, then wait for the new firmware to be installed on the tablet.
- [sc name=”banner-jos”]Disconnect the tablet from the laptop after the gadget restarts and displays “Pass” on the touchscreen. Because if it does that, you can finally fully enjoy the Android 4.0.4 on your Galaxy Tab 7.7 GT-P6810 by launching it like this: tap Settings, then About Tablet.
The new firmware can leave yo disappointed. If you feel like that, go to the NANDroid backup file first, then use it to revoke the update process and restore your gadget to the ROM it had before the upgrade.
In case there’s trouble of any kind at one point or another during the tutorial, our comment field below is open for questions.


