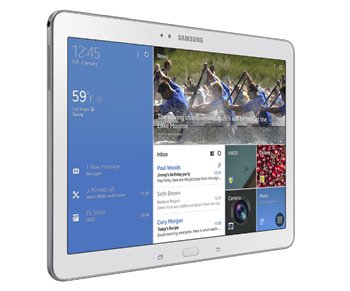
How to Flash KitKat 4.4.2 XXUANC4 on Galaxy Tab PRO 10.1 LTE-A SM-T525
Android 4.4.2 is worth having on Galaxy Tab PRO 10.1 LTE-A SM-T525. Why? You’ll find out soon enough!
By choosing to perform an update, your tablet is going to benefit from some of the best Android versions around. And when this version is the KitKat 4.4.2, your gadget will go through many great changes. We are talking about customization, new features, superior battery and so much more. The upgrade also delivers novelties such as features and apps that will work wonders on the tablet.
What we want to help you with today is a guide on how to install the XXUANC4 official firmware on the Galaxy Tab PRO 10.1 SM-T525. This tool, released this month, is now available for Italy with a deactivated KIES logo. As always, this lack of an activation means that KIES software isn’t available for use. OTA is, however. But even if you can use it instead of the other variant, you have to own a tablet with stock ROM.
Because only your tablet can be used with the new firmware, stay away from a different model.
Something has to be said about performing the update on a rooted Samsung SM-T525. When such a gadget is involved, damage will be done to it. In this case, the system partition will be erased and root access shall be revoked. Important stuff such as internal / external SD cards, data and so on won’t be affected.
Prerequisites
After discussing this firmware for a bit, let’s get on with it. Your first task is to follow the requirements below:
- make backups to preserve the tablet’s important content;
- a full NANDroid backup has to be created, too;
- USB Debugging must be activated on your tablet now;
- there are USB drivers for your tablet and they have to be installed on your laptop;
- a laptop which is running Windows needs to be used for this tutorial;
- the battery of your tablet has to be fully charged;
- turn off, on the notebook, the security programs there;
- disable, on your tablet, its security programs.
Step by step instructions
- For the beginning of this procedure, we recommend downloading this package first on your laptop: Odin v3.09. Once done, the latter will have to be extracted with WinZip or WinRar. Use the same tool on the after you’ve downloaded it on the laptop.
- Once both are unzipped there, look for Odin v3.09.exe, open it on the notebook, then be sure to do this: enter the tablet in Download Mode. This operation is very easy to perform. You need to only press and simultaneously hold Home, Power and Volume Down; this should be followed by you waiting for a boot message to pop up, which will imply this next task: press Volume Up.
- Your tablet and the laptop must now be connected to the laptop. To make this possible, you have to use the tablet’s USB cord. When the connection is done, the Odin will come up and display a sign in blue.
- This will happen so that you know whether the plugging’s been successful or not. So, when you know that the devices are connected to each other, you will be able to move on by adding the firmware file to AP / PDA.
- The next thing you should be doing now: activate two boxes. They are F. Reset Time and Auto Reboot. You will then need to start the installation of the Android 4.4.2 XXUANC4. For this next phase, we advise you to go and tap “Start“. You should then wait for the flashing to be over.
- When the new firmware’s installation is completed, your SM-T525 will display this message: “Pass”. As soon as the display has it on, you can unplug the devices from each other but not before you wait for the tablet to reboot.
- [sc name=”banner-jos”]When you are done removing the tablet from your notebook, you should tap Settings and then tap About Tablet. This is in case you want to have quick access at the new OS so that you can enjoy all of the novelties on it.
Get a taste of them and, if you don’t like them, you can always return to the old ROM. If you decide to do that, the NANDroid backup file will prove helpful with that. Unfortunately, the upgrade procedure is going to be revoked.
We have a comment field at the end of this guide. Leave your questions and comments there.


