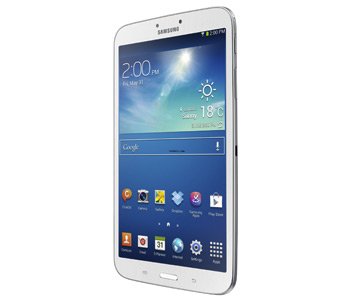
How to Install Android 4.2.2 XWUANA1 on Galaxy Tab 3 8.0 SM-T311
German users of Galaxy Tab 3 8.0 SM-T311 should prepare their tablet for an upgrade. The new thing to look forward to is Android 4.2.2. The tool which will make for a successful procedure is XWUANA1 official firmware.
Consider the following if you want the Android 4.2.2: root access, if there is such a thing on your tablet, will be revoked. Another negative aspect of the update: the system partition will be deleted. That won’t happen to the important data or internal/external SD cards.
To get the Jelly Bean 4.2.2 is sure to land on your Galaxy Tab 3 T311, this should be the only gadget you use to avoid a bricking. We don’t recommend using KIES instead of our guide; the KIES logo isn’t activated on the XWUANA1. What you can use instead of our own method, if your tablet’s running stock ROM, is OTA.
The most important thing about an update is the many novelties you get access to. In the case of this OS version, these novelties start from a new Gallery app, go through the option of long-pressing the WiFi Bluetooth icons in Quick Settings in order to be able to toggle the on/off state and continue with a USB debug white-list.
The goodies also mean Bluetooth audio streaming, low battery bug fixes a new set of download notifications. To round it off, your tablet will experience the following: a new set of sounds for wireless charging. Customization tweaks and options are also present. 
Prerequisites
Next on the list: perform some pre-requisites. The list is below:
- make a full NANDroid backup via this guide;
- your tablet’s USB Debugging must be enabled;
- the tablet’s security solutions shouldn’t be running for this procedure;
- also, make sure the security programs on the notebook aren’t working;
- charge, if necessary, the tablet;
- keep the tablet’s content safe by creating backups;
- get USB drivers installed on your notebook from here;
- we only accept, for this tutorial, laptops running Windows.
Step by step instructions
- The number one thing to be done now: find Odin and the and download each of them on your laptop.
- Continue this step by unzipping the packages with an unzipping tool and make sure your tablet is booted into Download Mode for the next step. The booting is done like this: press and simultaneously hold Volume Down, Home and Power, look the logo of Android and a triangle on the display, then press Volume Up.
- Open, on your laptop, the Odin as an Admin. Should you be done with this action, take the USB cord of your tablet. It should be used to create a connection between the Galaxy Tab 3 8.0 SM-T311 and the laptop.
- The plugging should end when a yellow ID:COM box and a message reading “Added!!” are displayed. If they aren’t, time for a different approach. The latter should include trying a second installation of the USB drivers or the use of another USB port.
- If, however, you don’t run into issues with the plugging phase, do this: click on BL, choose a file with BL in the name, tap AP, choose a file with AP in the name, tap CP, choose a file with CP in its name, tap CSC, select a file which has CSC in the name, click on PIT and choose a file that should have an extension going by the name of.pit.
- Operate, for our next step, this task: activate F. Reset Time, Re-partition and Auto Reboot.
- If these three boxes are now successfully checked, tap “Start“. Only by doing this will you be able to see the new official firmware get installed on your tablet.
- The flashing will end in a matter of minutes, so it’s best to just wait for the gadget to restart. If it does, the next thing you should wait for: a “Pass” message in a green background. When you spot this, disconnect the tablet from your laptop by removing the USB cord.
- [sc name=”banner-jos”]After the unplugging happens, you should take note of the new firmware on your Samsung SM-T311. For that, open it as shown here: tap About Tablet after you’ve chosen Settings. Now search for the XWUANA1 and click on it to activate it.
See if you like the goodies you get with it. In case you don’t, the old ROM can be retrieved. Just go to the NANDroid backup file and launch it to revoke the upgrade.
Then, if you don’t understand something about the procedure and want to ask us questions, use the comment section under this post. We’ll then get back at you soon!


