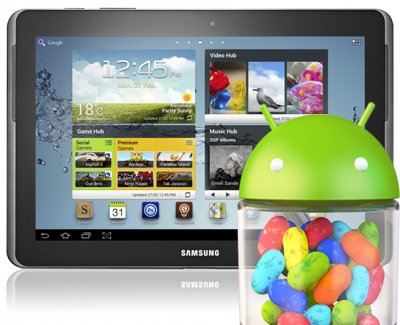
How to Update Galaxy Note 10.1 N8000 to Android 4.1.2 XXCMJ2
Galaxy Note 10.1 N8000 is next in line for an upgrade to Android 4.1.2. This tablet, launched officially last year, will get to meet this OS helped by XXCMJ2. And you will get to test it after installing it on your gadget with this tutorial.
November was the release date of the new firmware aimed at Open Austria. December came along to offer the XXCMJ2 official firmware to Spain (Movistar), Italy and Spain.
The novelties
The presence of the new firmware and the latest Android means access to these additions: group cast, sync and connect email updates, triple buffering all share, pop up play, a fixed frame of 60 fps, extended Vsync timing, automatic adjustment for the size of widgets, Google Now, touch anticipation, mini apps, free style widget and a new keyboard.
You will need to use the Galaxy Note 10.1 GT-N8000 if you want to have a go at these goodies. Using another model will only brick it. If the device is rooted, the new tool that you’ll install on it will erase the system partition and revoke root access. The tablet’s important data, however, will be saved; as will both the gadget’s internal and external SD cards.
The KIES logo is activated on each of the new firmware’s variants for all the different countries we mentioned. When this logo is turned on, it means that you can upgrade this tablet via Samsung’s KIES; but only if the Galaxy Note 10.1 N8000 has a stock ROM running among its specs. OTA (over the air via the Software Update button under Settings menu) is another method you can use if you don’t like our method (this option also requires the presence of stock ROM on your tablet).
Requirements
To move on, you will need to take a look at these requirements:
- charge the battery of your tablet if the battery status shows it’s empty;
- make sure your notebook comes with Windows;
- create a regular backup and a full NANDroid one, via these instructions;
- be sure to have USB Debugging turned on;
- turn off the security programs features on the tablet and the laptop;
- download USB drivers compatible with the tablet, from here on the notebook.

Step by step instructions
- The first step requires the user of the Galaxy Note 10.1 N8000 to download, on his or her laptop, these 2 packages: the Android 4.1.2 N8000XXCMJ2 (the Spain version , the Italy version from , the Spain Movistar version and the Open Austria version from ) and Odin tool, available here. The file is also available for other countries. The Russian version is available on , the MegaFon version is ready for download on and the Ukraine (Kyivstar) version is available .
- Then, helping yourself with a special tool (WinZip or WinRar are two good options), unzip them and after that be sure to get your tablet in Download Mode. To do as such, we recommend applying this method: simultaneously press and hold Volume Down and Power, see if there’s an Android icon on the display, then press Volume Up.
- Your next set of instructions looks like this: open the Odin as an Admin on your laptop and establish a connection between the tablet and the latter device with the gadget’s USB port.
- If the connection is truly successful, the screen will display “Added!!” and a yellow ID:COM box on it; if not, we prompt you to select one of this alternative methods when problems appear: flash, on your notebook, the USB drivers again or use another USB port.
- If nothing bad happens during the previous step, you can click on PDA, opt for a file with CODE in the name, tap Phone next, opt for a file with MODEM in the name, then tap CSC, select a file sporting CSC in the name, click on PIT and choose a file with .pit extension in the name.
- If you are all done with this part, here comes something else: check the boxes titled Auto Reboot, Re-partition and F. Reset Time. The XXCMJ2 is going to be flashed on your tablet after you tap “Start”.
- [sc name=”banner-jos”]At the end of this installation phase, the Galaxy Note 10.1 GT-N8000 shall restart automatically. Wait until “Pass” is displayed before you perform the last step, which is this one: unplug the tablet from the laptop. The new firmware will then be in the gadget’s “About Tablet“.
The new Jelly Bean 4.1.2 stock ROM may not suit your needs. If that is so, you have to revoke the upgrade by using the NANDroid backup file. This is the way to restore the old ROM back on the gadget.
We will answer your questions via the comment section below, so use it in case you run into issues during this guide.


